Some Like it Hot!!

I love HOT BREAKFAST!!  But, I don’t necessarily LOVE to make it.  I am absolutely not a morning person, and in the AM, I am most comfortable GRUMBLING until after I have had my STRONG COFFEE.

Breakfast Ideas that Start the Night Before - Give Your Family a Hot Meal without having to Cook in the AM

That being said, I don’t have the luxury of doing that anymore now that I have little ones to get up and get dressed.  The other day a girlfriend of mine told me that she got guilt-ed into making breakfast for her kids when a coworker told her that she makes her kid’s hot breakfast EVERY DAY!!  She went on to ask if my kids eat Oatmeal.  Which they don’t and to tell me that she was preparing Oatmeal in her Crock Pot(that night), so that they could eat in the morning.

This got me to thinking about all the different meals that I could prepare for breakfast the night before.  Now, don’t get me wrong, I am not about to change into June Cleaver over night.  But, I wouldn’t mind finding something I could throw in the Slow Cooker on a Friday or Saturday night, since I normally try to make Hot Breakfast for the Whole Family on the Weekend!!

We are pretty traditional when it comes to our Breakfast Foods.  The usual, Turkey Bacon, Sausage, Eggs, Toast or Biscuits.  I sometimes get a little fancy, when afforded the luxury of sleeping in with omelettes and quiche, but not often, since I tend to be the only one eating it.

Soo… after doing some Pinterest Hunting, these are some recipes that I am putting in my arsenal.  I am adding them to my Fall Bucket List, and will updpate you all on how Easy they are, but more importantly how they go over with the Fam!!

Do you cook breakfast in the Crockpot?  What’s your go to Breakfast?

Crock Pot French Toast

Copy Cat Cracker Barrel Hash Brown Casserole

Breakfast Casserole –** I have already tried this one several times, but not in a while.  I should tell you that it always RETURNS BIG REVIEWS.  I have even taken it to work before for Department Breakfasts and everyone  loved it!!

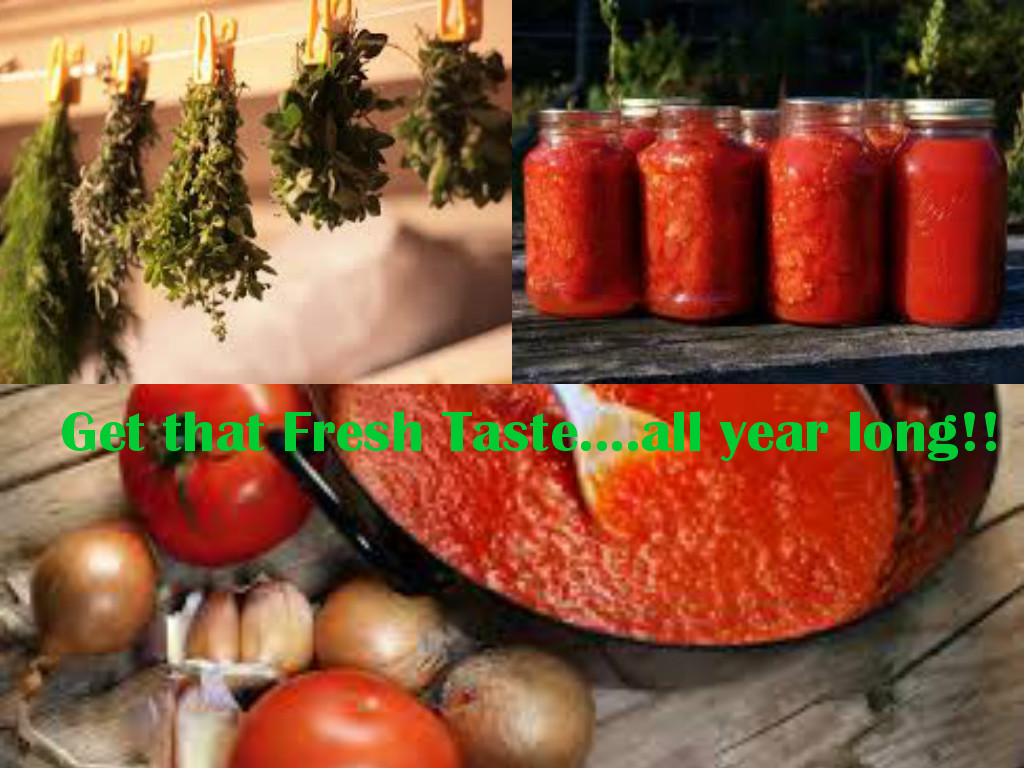
Fresh Herbs and Tomatoes…

Every Spring, I have these grand ideas about all the great things I will plant and harvest.  But, it seems like each year, I grow less and less.  This year, I grew tomatoes and Basil and unfortunately, that was it.

Fotor01019143510

But, as it starts to get cooler outside, I have been thinking about what I can do to preserve my basil.  I have gotten spoiled and there is just nothing like having fresh basil in your meals, even if I am the only one who really appreciates it.

Here are some different methods to preserve your herbs:

How to Dry and Store Herbs

9 Ways to Dry Herbs

And, if you have more tomatoes than you know what to do with.  Consider making your own Tomato Sauce or Canning?

How to Make Your Own Tomato Sauce?

How to Can Tomatoes

Happy Harvesting!!


Fall Into Comfort Food — All Over the Web…

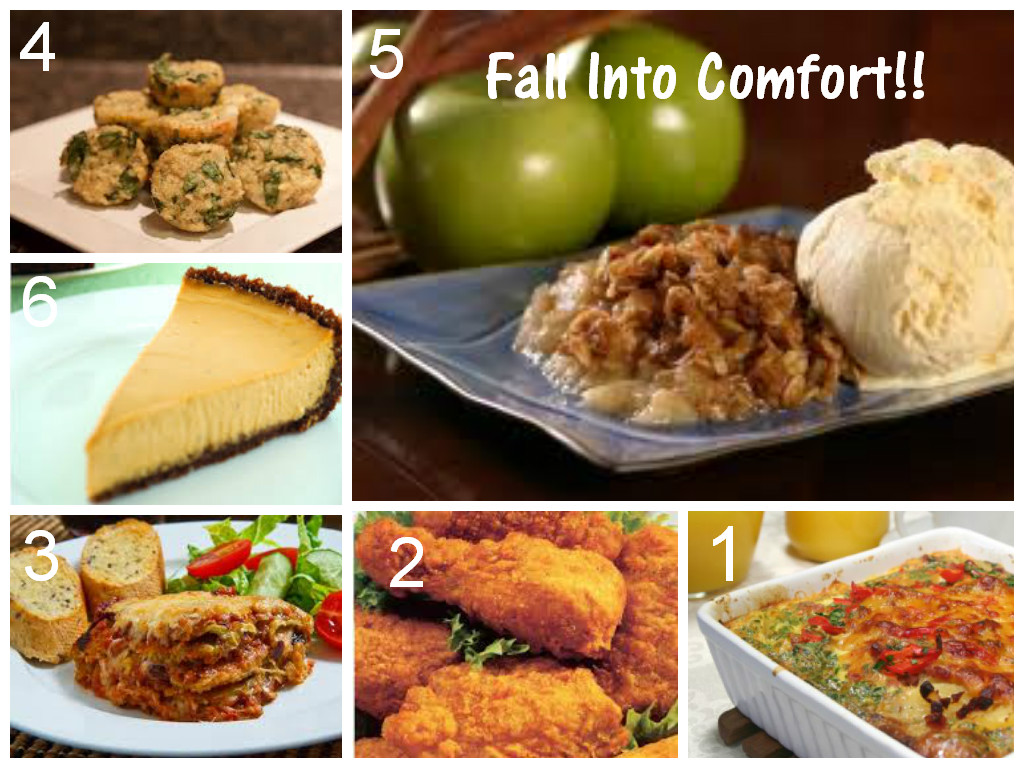
It’s getting chilly out there!!  Here are some great recipes I found all over the web!!

Fotor01018192913

I have tried the Breakfast Casserole, as well as the Oven Fried Chicken.  Both yummy!!

Breakfast:

Crockpot Breakfast Casserole

Entrees:

Oven Fried Chicken

Eggplant Parmesan

Finger Food:

Parmesan Spinach Bites

Dessert

Easy Apple Crisp

Pumpkin Cheesecake in a Gingersnap Crust – ** I plan to try my hand at this tomorrow.

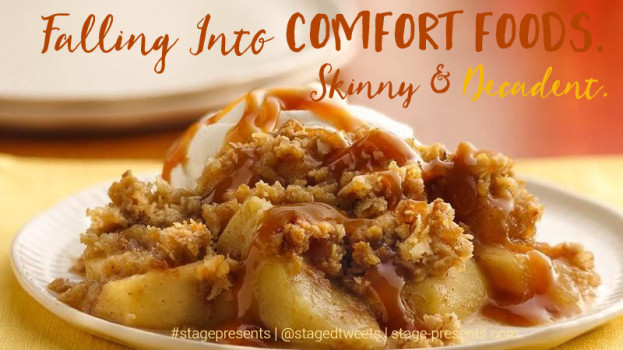
Falling Into Comfort Foods – Apple Crisp Recipes (Skinny and Decadent)

As a child growing up in the North, fall has always been associated with the changing of the leaves, the crisp morning air, trips to the Pumpkin Patch and Apple Picking.  As an adult,  I find myself gravitating to those smells at this time of the year.

Looking for the Apple Cinnamon smell in candles and air fresheners and placing cinnamon brooms all over the house, and even indulging in a little baking here and there.

Here are two recipes for a Great Fall Dessert I like, one is a little less indulgent, though just as tasty and the other is just downright decadent.

Falling Into Comfort Foods - Skinny & Decadent Recipes for Apple Crisps - A Fall Favorite

Photo Source:

Skinny Cinnamon Apple Crisp
Recipe Found Here
Servings: 8 • Serving Size: 1/8th • Old Points: 5 pts • Points+: 7 pts
Calories: 242.0 • Fat: 6.8 g • Protein: 2.3 g • Carb: 49.5 g • Fiber: 4.5 g • Sugar: 32.3 g
Sodium: 10.1

For the Filling:

  • 5 medium apples, peeled and diced
  • 1.5 oz raisins (small box)
  • 1/2 tsp cinnamon
  • 1/2 lemon, juiced
  • 3 tsp cornstarch
  • 1/4 cup agave nectar

For the Topping:

  • 1 cup Quaker quick rolled oats
  • 1/3 cup whole wheat flour
  • 1/2 cup light brown sugar (not packed)
  • 1 tsp cinnamon
  • 1/4 cup (half stick) butter, melted

Directions:
Heat oven to 375 degrees. Combine apples, raisins, cinnamon, agave nectar and lemon juice in large bowl. Sprinkle with cornstarch. Toss until fruit is coated. Place fruit in an ungreased baking dish.

Mix remaining ingredients. Sprinkle over fruit. Bake about 40 minutes or until topping is golden brown and fruit is tender.

Serve with a scoop of low fat ice cream or fat free frozen yogurt. Enjoy!!

Now for our more Decadent Recipe  –

Easy Apple Crisp with Oatmeal Streusel Found Here

Difficulty: Easy | Total Time: | Makes: 8 servings

When you don’t have time to roll out the dough for an apple pie, a crisp is the next best thing. Just peel, core, and slice the apples; toss them with a bit of sugar and cinnamon; and dump them into a baking dish. Then mix the oats, brown sugar, and butter for the streusel in the same bowl you used for mixing the apples, which saves you a dish to wash. Sprinkle the streusel over the apples, and in about an hour you’ll have an easy dessert of bubbling apples blanketed with a crunchy, sweet topping.

Game plan: Adjust the sugar in this recipe to the sweetness of the apples, using 2 tablespoons for exceptionally sweet ones and 3 if the apples are on the tart side.

Click here to watch the CHOW Test Kitchen’s Amy Wisniewski make this easy apple crisp in our Easiest Way video series.

INGREDIENTS
  • 2 1/2 pounds medium Granny Smith and Golden Delicious apples (about 5 or 6), peeled, cored, and sliced 1/4 inch thick
  • 2 to 3 tablespoons granulated sugar
  • 3/4 teaspoon ground cinnamon
  • 1/4 teaspoon fine salt
  • 1/2 cup packed light brown sugar
  • 1/2 cup uncooked rolled oats
  • 1/3 cup all-purpose flour
  • 4 tablespoons cold unsalted butter (1/2 stick), cut into small pieces, plus more for coating the dish
INSTRUCTIONS
  1. Heat the oven to 350°F and arrange a rack in the middle. Lightly coat an 8-by-8-inch baking dish with butter.
  2. Combine the apples, granulated sugar, cinnamon, and 1/8 teaspoon of the salt in a large bowl and toss to coat. Place the apple mixture in the prepared baking dish and set aside.
  3. Using the same bowl as for mixing the apples, mix together the brown sugar, oats, flour, and remaining 1/8 teaspoon salt until evenly combined. With your fingertips, blend in the butter pieces until small clumps form and the butter is well incorporated, about 2 minutes.
  4. Sprinkle the topping evenly over the apples and bake until the streusel is crispy and the apples are tender, about 50 to 60 minutes. Let cool on a rack at least 30 minutes before serving.

Follow the link above for Beverage Pairing Ideas.  And, if you happen to try either of these recipes be sure to let me know which one you love.

Falling Into Comfort Food – Looking for Some Dinner Ideas?

30 Minute Chili

chili

Ingredients

  • 2 pounds lean ground beef
  • 1/3 cup Chili Seasoning Mix
  • 2 (14.5-oz.) cans diced tomatoes with green pepper, celery, and onion
  • 2 (8-oz.) cans tomato sauce
  • 1 (16-oz.) can black beans, undrained
  • 1 (15.5-oz.) can small red beans, undrained

Preparation

  1. 1. Brown beef in a Dutch oven over medium-high heat, stirring often, 4 to 5 minutes or until beef crumbles and is no longer pink; drain well. Return beef to Dutch oven; sprinkle evenly with seasoning mix, and sauté 1 minute over medium-high heat.
  2. 2. Stir in diced tomatoes and remaining ingredients; bring to a boil over medium-high heat, stirring occasionally. Cover, reduce heat to low, and simmer, stirring occasionally, 15 minutes.
  3. Italian-Style Chili: Substitute 1 lb. Italian pork sausage and 1 lb. lean ground beef for 2 lb. lean ground beef. Remove casings from sausage, and discard; brown sausage and ground beef together as directed. Omit beans, and stir in 1 small onion, diced; 1 green bell pepper, diced; 2 small zucchini, diced; and remaining ingredients. Proceed with recipe as directed. Serve chili over hot cooked spaghetti noodles tossed with olive oil and chopped fresh cilantro. Makes 6 to 8 servings. Prep: 10 min., Cook: 25 min.

Southern Living 
JANUARY 2007

Another Great After Thanksgiving Recipe – Turkey Dumpling Stew

Turkey Dumpling Stew

Another After Thanksgiving Recipe - Turkey Dumpling Stew

Photo Source: Food Network Magazine

Recipe courtesy of Food Network Magazine

Prep Time:
50 min
Inactive Prep Time:
Cook Time:
4 hr 0 min
Level:
Intermediate
Serves:
6-8 servings
 Ingredients
  • 1 leftover roasted turkey carcass, plus 3 to 4 cups shredded turkey meat
  • 1 onion, quartered
  • 2 stalks celery, quartered crosswise (save the leaves for the dumplings)
  • 1 pound carrots (3 quartered crosswise; the rest thinly sliced)
  • 1 bay leaf
  • 3 sprigs parsley
  • 3 sprigs thyme
  • Dumpling dough (recipe linked below)
  • 4 tablespoons unsalted butter
  • 4 shallots, minced
  • 1/4 cup all-purpose flour
  • Kosher salt and freshly ground pepper
  • 1 pound parsnips, peeled and thinly sliced Juice of 1/2 lemon
  • 1 pound green beans, trimmed and cut into 1-inch pieces
  • Chopped fresh chives, for topping

Directions

Make the stock: Pull the turkey carcass apart into smaller pieces; set the meat aside. Put the bones in a large, deep pot and add cold water to cover, 4 to 5 quarts. Add the onion, celery, the 3 quartered carrots and the bay leaf. Tie the parsley and thyme together with twine and add to the pot, then cover and bring to a simmer over medium heat. Uncover, reduce the heat to medium low and cook 3 to 4 hours. Remove the bones and vegetables with a skimmer and discard, then strain the stock though a fine-mesh strainer. Return the stock to the pot and simmer over medium-high heat until reduced by half, 30 to 40 minutes (you’ll have about 8 cups stock).

About 45 minutes before serving, prepare the dumplings . Keep covered with plastic wrap while you make the stew.

Make the stew: Melt the butter in a large, wide pot over medium heat. Add the shallots and cook until soft, about 3 minutes. Add the flour and cook, stirring, 30 seconds. Gradually add the stock, stirring, and bring to a simmer. Season with salt and pepper. Add the sliced carrots and parsnips, cover and cook 5 minutes.

Stir in the turkey meat, lemon juice and green beans. Add the dumplings in a single layer (leave as squares or pat into rounds). Cover and simmer until the dumplings are cooked through, about 20 minutes. Ladle into bowls; top with chives.

Photograph by Con Poulos

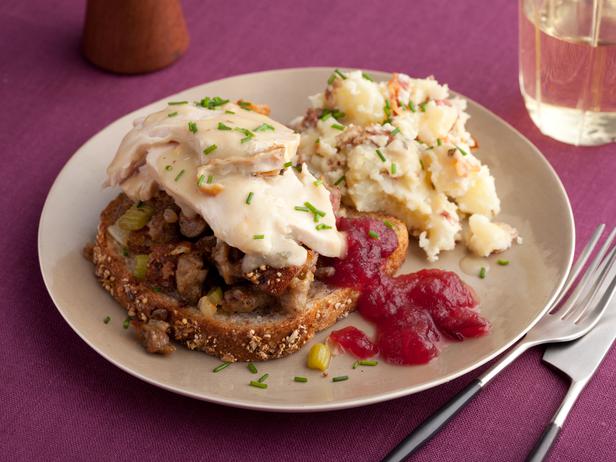
After Thanksgiving Recipes: Open Faced Sandwiches

What a Face! Open Faced Hot Turkey Sammys with Sausage Stuffing and Gravy, Smashed Potatoes with Bacon, Warm Apple Cranberry Sauce

Open Faced Hot Turkey Sammys with Sausage Stuffing and Gravy, Smashed Potatoes with Bacon, Warm Apple Cranberry Sauce

Recipe And Photos courtesy of Rachael Ray

Prep Time:
20 min
Inactive Prep Time:
hr min
Cook Time:
25 min

Level:
Intermediate
Serves:
4 servings

Ingredients

Smashed Potatoes:
2 pounds new potatoes or baby Yukon gold potatoes
1/2 cup sour cream
2 tablespoons butter
3 strips par cooked bacon, crisped in microwave and chopped (recommended: Ready
Crisp)
Salt and pepper
Warm Apple Cranberry Sauce:
1 cup store bought apple sauce
1 (14 ounce) can whole berry cranberry sauce
Stuffing:
2 slices whole grain bread

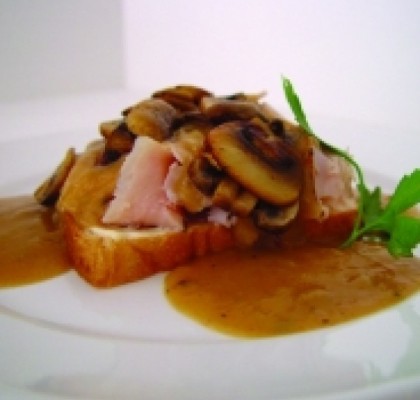
Open Faced Roast Turkey Sandwiches with Mushroom Gravy

Open Faced Roast Turkey Sandwiches with Mushroom Gravy Recipe and Photo Courtesy of Emeril Lagasse 2007

Recipe courtesy Emeril Lagasse, 2007

Prep Time:
8 min
Inactive Prep Time:
hr min
Cook Time:
15 min
Level:
Easy
Serves:
4 sandwiches

Ingredients

4 tablespoons unsalted butter
8 ounces fresh white button mushrooms, wiped clean, stemmed, and thinly sliced
1 teaspoon chopped fresh thyme leaves
3/4 teaspoon salt
1/4 teaspoon freshly ground black pepper
3 tablespoons all-purpose flour
1/4 cup finely chopped yellow onion
1 tablespoon finely chopped celery
2 cups reduced-sodium chicken broth
1 teaspoon Essence, recipe follows
2 tablespoons mayonnaise
10 to 12 ounces thinly sliced roast turkey breast
4 slices home-style white bread, toasted, optional

For More After Thanksgiving Meal Ideas follow this link.


My First Thanksgiving Turkey!!

A couple of years ago, I made my first turkey.  I was soo nervous, I was even dreaming about the turkey.  What if it didn’t turn out right, what if it was too dry, etc. etc.? But, it turned out great, and I am a big fan of “IF IT AINT BROKE, DON’T FIX IT”.  So here is the tried and true recipe I found here for a Yummy Juicy Turkey!!

Roasting Tips for a Moist and Tasty Turkey

There are many methods used to cook a moist and tasty Roasted Turkey. Most methods rely on basting. The turkey can be basted every 30 minutes with a basting bulb, or covered with cheesecloth soaked in butter. Other methods include brining the turkey (soaking in a salt water solution for 8-10 hours), or injecting a basting solution into the meat. Whatever method you prefer, proper roasting is key to tender moist meat.

** Personal Note: As my basting sauce, I used one stick of butter, rosemary, cracked black pepper, chicken broth, sage, and thyme.

Completely thaw the turkey.  Start early and thaw the turkey in the refrigerator or in a place where the air temperature is no higher than 40 degrees.  A 20-pound turkey takes about two or three days to thaw completely.  Be sure the turkey is thawed completely, until no ice appears in the inner cavity and the meat is soft.  Be careful:  If the inner cavity is still frozen or even partially frozen when you put the turkey in the oven, the outside of the bird will be done before the inside, and the inside temperature will  not be hot enough to destroy disease causing bacteria, or if it is, the outside meat will be dried out before the center is done.

Remove the neck and giblets from the cavities. If this is your first time cooking the turkey, be sure that both cavities are emptied. Reserve the neck and giblets for use in preparing the giblet gravy, if desired.

Prepare the stuffing. If you are preparing the stuffing early, mix only the dry ingredients. It is recommended that you cook the stuffing separately, but if you do stuff the turkey, do not stuff it until you are ready to roast it. Stuff the cavity loosely. Do not pack it. If you choose to cook the stuffing separately, you can place a quartered onion and some celery leave and other desired herbs in the cavity for flavor.

Prepare a basting sauce. I prefer to baste with melted butter to which I add fresh or dried herbs. You can also baste with a mixture of wine and butter. Baste the turkey with your sauce and place a loose tent of aluminum foil over the turkey to prevent the skin from burning before the turkey is cooked. This tent will be removed during the last 45 minutes or so of cooking. If you are using cheesecloth, soak the cheesecloth with the basting sauce and place over the breast and drape onto the thighs. When using cheesecloth, you do not need the foil tent. Baste the turkey every 30 minutes during roasting.

Roast your turkey at 325 degrees for the recommended time for the weight of your turkey. These times are approximate and should be confirmed with a meat thermometer. Be sure to check the thermometer about 3/4th of the way through the time indicated so as not to overcook. Dry meat will result if the turkey is overcooked. The following table gives approximate times for roasting turkey at 325 degrees F.

Estimated Cooking Times

Wt. of Turkey Unstuffed Stuffed

10-18 lbs 3- 3 1/2 hrs. 4 – 4 1/2 hrs

18-22 lbs 3 1/2 – 4 hrs 4 1/2 – 5 hrs.

22-24 lbs 4- 4 1/2 hrs 5 – 5 1/2 hrs

24-29 lbs 4 1/2- 5 hrs 5 1/2 – 6 1/2 hrs

The turkey must be roasted all at once. You cannot partially cook it ahead for later finishing. This method has been shown to increase the chances of food borne illnesses.

For safety and doneness the internal temperature must reach 180 degrees F in the thigh and 170 in the center of the breast. If the turkey is stuffed, the stuffing should reach 165 degrees F in the cavity. This temperature is essential to prevent food borne disease, and should be measured with a meat thermometer. The pop-up thermometer that comes in many turkeys serves as a good approximate of doneness, but should not be relied on as the ultimate authority. When placing the meat thermometer in the thigh or breast, it is important not to touch the bone. The bone conducts heat and will be hotter than the meat. Do not allow the cooked meat to come into contact with anything that has touched the raw turkey.

During the last 30 – 45 minutes of cooking, remove the foil tent to encourage browning. If you desire to use a glaze, spread it over the turkey now with a pastry brush.
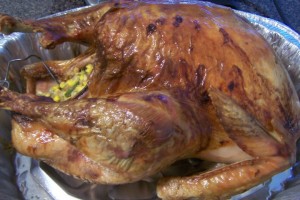
My First Thanksgiving Turkey - A Recipe for a Super Moist Bird

Pulling off your first Holiday Meal, is a right of passage.  It can definitely be stressful, but it can also be very fulfilling.  Good Luck!!